Porcelain tile installation tips and tricks
If you reside in Manhattan, Queens, or Brooklyn, the challenge of expressing your individuality in such a populous area is self-evident. Step up to the challenge, and the chances are that you’ll concentrate your efforts on the friendliest, most-used room of your home, which is the kitchen. No place else showcases your style to so many of your family and friends. Let’s begin by taking a look around your kitchen. If the appliances are in good order, consider the work area. Many older homes, whether in Brooklyn, Queens, or Manhattan, contain formica counters and backsplashes. While formica does repel water, it leaves something to be desired in its style. Practically speaking, formica stains, scratches, cracks, and shows burn marks more easily than porcelain tile does. Before you dismiss tile as too difficult to put in, do the research. Your project may extend not only to countertops, but to a more durable floor.
Contents
Porcelain Tile Installation Is Easier Than You Think
To begin with, porcelain has been fired in a kiln to make it dense and more water-resistant than other materials. Porcelain tile comes in multiple sizes, from smaller than one inch squares for intricate mosaics to more than one foot squares for flooring. An average size is the popular rectangular subway size tile that is suited for all kitchen countertops and bathroom applications. Examine your current surfaces for uneven areas, such as dips or bulges. Any part of the underlayment that is not level will need some fine tuning before applying porcelain tile, as new surfaces need a smooth foundation to prevent uneven wear. Professionals throughout Brooklyn, Queens, and Manhattan realize that trouble spots may need a cement board layer to make sure that new tile adheres easily to a completely level surface. Once the foundation is smoothed over, it’s a good idea to set aside a block of time for your project, and if you allow a reasonable amount of flexibility, you’re assured of a makeover to be proud of.
Kitchen Pantry Cabinet Style Ideas
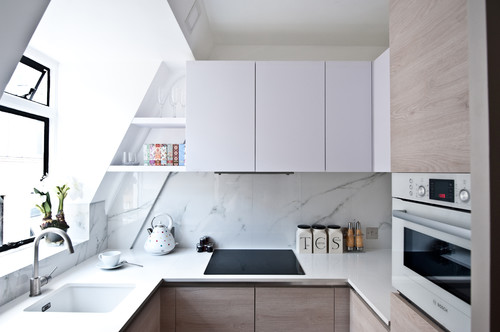
Now that you’ve decided on porcelain tile installation, it’s time for the fun part of your project: designing. Perhaps your favorite color features prominently as you dream and draw, and you realize that too much of a good thing may result. Consulting with experts at Home Art Tile in Queens will focus your needs for the expression of style which is your main intention. For example, your kitchen pantry is an ideal place to start your project, because not only does it need an upgrade, but it is fairly out of the way. You may practice your ideas here without the results being too obvious, so let’s begin by planning a half-wall of tile. This approach allows you to experiment with tile before committing to a full makeover.
Manhattan Glamour In Queens And Brooklyn
Moving along to the main project, porcelain tile installation on walls or floors takes care and a steady hand to achieve the result you wish. Your skills will be put to the test, and unless you possess a good deal of extra time, it may be wise to consult and contract with professional tile installers.
They have access to the tools, expertise, and personnel that will make the job run smoother and quicker. Your design will come to fruition sooner, and you will enjoy seeing it come to life under capable hands. They will handle unexpected aspects of the job because they have the experience to think on their feet to complete the project according to a deadline. Your time will be well-spent in admiring the progress and planning for the first party to celebrate your project’s completion, because porcelain tile installation was a lot easier than you thought.
Featured image source: Flickr